目錄
- YOLOV5-3.0/3.1版本
- YOLOV5-4.0版本
- 過程中的一些報錯
- 報錯1:打開攝像頭報錯
- 報錯2:攝像頭報錯
- 報錯3:在創建虛擬環境后,安裝庫的時候出現錯誤
- 報錯4:
- 報錯5:cv2版本報錯4.5.1
對于yolo系列����,應用廣泛���,在win10端也有很大的應用需求�,所以這篇文章給出win10環境下的安裝教程。
先給出系列文章win10+anacnda實現yolov3
YOLOV5-3.0/3.1版本
版本問題
python 3.7 torch 1.6.0 torchvision 0.7.0 cuda 10.1
注意:Yolov5-3.1只能使用torch 1.6.0
1.在網站下載對應版本的torch和torchvision的whl文件
https://download.pytorch.org/whl/torch_stable.html
2.新建虛擬環境
conda create -n YOLOV5-3.1 python=3.7
3.查看虛擬環境
4.激活虛擬環境
5.安裝相關庫
pip3 install opencv-python==4.4.0.46 -i https://pypi.tuna.tsinghua.edu.cn/simple/
pip3 install numpy==1.19.2 -i https://pypi.tuna.tsinghua.edu.cn/simple/
pip3 install Cython==0.29.21 -i https://pypi.tuna.tsinghua.edu.cn/simple/
pip3 install pillow==8.0.1 -i https://pypi.tuna.tsinghua.edu.cn/simple/
pip3 install matplotlib==3.3.2 -i https://pypi.tuna.tsinghua.edu.cn/simple/
pip3 install pyyaml==5.3.1 -i https://pypi.tuna.tsinghua.edu.cn/simple/
pip3 install tensorboard==2.3.0 -i https://pypi.tuna.tsinghua.edu.cn/simple/
pip3 install scipy==1.5.2 -i https://pypi.tuna.tsinghua.edu.cn/simple/
pip3 install tqdm==4.54.0 -i https://pypi.tuna.tsinghua.edu.cn/simple/
pip3 install pandas==1.1.3 -i https://pypi.tuna.tsinghua.edu.cn/simple/
pip3 install seaborn==0.11.0 -i https://pypi.tuna.tsinghua.edu.cn/simple/
pip3 install pycocotools==2.0.2 -i https://pypi.tuna.tsinghua.edu.cn/simple/
6.安裝torch
將路徑跳轉到步驟1中下載的文件位置���,使用pip install .....whl 格式來安裝whl文件
7.驗證
import torch
#查看版本
print(torch.__version__)
#查看gpu是否可用.返回True則表示可以使用gpu
torch.cuda.is_available()
#返回設備gpu個數
torch.cuda.device_count()
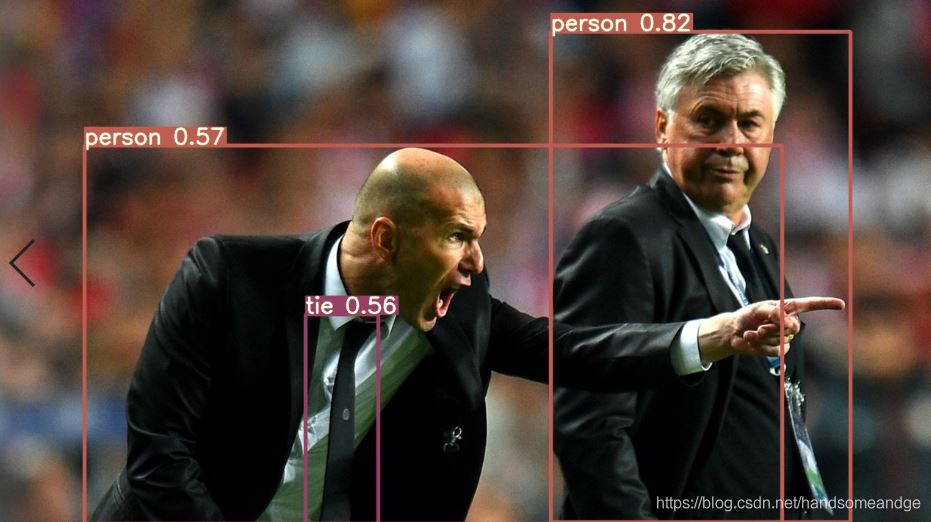
8.圖像檢測
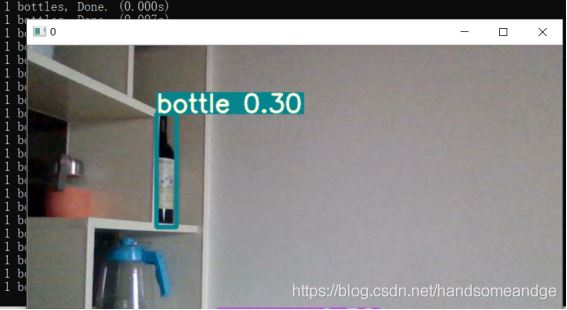
9.調用攝像頭
python detect.py --source 0
YOLOV5-4.0版本
電腦配置
CPU:i7-10750H
內存:16G
顯卡:GTX1650 4G
Anaconda:4.9.2
1.一開始就最好把源換一下
查看當前下載源

conda config --show-sources

添加源:

conda config --add channels https://mirrors.tuna.tsinghua.edu.cn/anaconda/cloud/pytorch/

conda config --add channels https://mirrors.tuna.tsinghua.edu.cn/anaconda/cloud/menpo/

conda config --add channels https://mirrors.tuna.tsinghua.edu.cn/anaconda/cloud/bioconda/

conda config --add channels https://mirrors.tuna.tsinghua.edu.cn/anaconda/cloud/msys2/

conda config --add channels https://mirrors.tuna.tsinghua.edu.cn/anaconda/cloud/conda-forge/

conda config --add channels https://mirrors.tuna.tsinghua.edu.cn/anaconda/pkgs/main/

conda config --add channels https://mirrors.tuna.tsinghua.edu.cn/anaconda/pkgs/free/

conda config --set show_channel_urls yes

查看當前下載源

conda config --show-sources

如果出現國內源掛掉的情況,就換回默認源

conda config --remove-key channels
2.新建虛擬環境
conda create -n YOLOV5-4.0 python=3.7
3.查看虛擬環境

4.激活虛擬環境
5.安裝相關庫
注意1:這里不能直接使用pip install -r requirements.txt 這樣直接安裝會默認安裝cpu版本的torch���,不知道為什么,可能是torch是其他庫的依賴庫���,這里不懂���,有會的小伙伴可以一起交流����。
注意2:Cv2的版本不能是4.5,需要指定成4.4或者以下。同時Python3.8裝不上cv2 4.4����。所以需要安裝python3.7版本����,這樣才能將cv2的4.4版本安裝上去。同時在安裝庫的時候需要先安裝opnecv-python���,不能先安裝numpy,這樣才能安裝上cv2的4.4版本���。
pip3 install opencv-python==4.4.0.46 -i https://pypi.tuna.tsinghua.edu.cn/simple/
pip3 install numpy==1.19.2 -i https://pypi.tuna.tsinghua.edu.cn/simple/
pip3 install Cython==0.29.21 -i https://pypi.tuna.tsinghua.edu.cn/simple/
pip3 install pillow==8.0.1 -i https://pypi.tuna.tsinghua.edu.cn/simple/
pip3 install matplotlib==3.3.2 -i https://pypi.tuna.tsinghua.edu.cn/simple/

pip3 install pyyaml==5.3.1 -i https://pypi.tuna.tsinghua.edu.cn/simple/
pip3 install tensorboard==2.3.0 -i https://pypi.tuna.tsinghua.edu.cn/simple/
pip3 install scipy==1.5.2 -i https://pypi.tuna.tsinghua.edu.cn/simple/

pip3 install tqdm==4.54.0 -i https://pypi.tuna.tsinghua.edu.cn/simple/
pip3 install pandas==1.1.3 -i https://pypi.tuna.tsinghua.edu.cn/simple/
pip3 install seaborn==0.11.0 -i https://pypi.tuna.tsinghua.edu.cn/simple/
pip3 install pycocotools==2.0.2 -i https://pypi.tuna.tsinghua.edu.cn/simple/
注意:這里需要先安裝opencv-python再安裝numoy,而且opencv-python的版本最好不好是4.5����。否則這里會報出CV2函數的錯誤�。
6.安裝torch
我們使用的版本依次是
pytorch==1.7.1 torchvision==0.8.2 torchaudio==0.7.2 cudatoolkit=10.2�。
torcp.7版本。Python對應3.7版本���,否則不能使用cuda。cv2要用4.5以下版本����。
YOLOv5最好使用cuda10.2版本
Yolov5 4.0建議搭配torcp.7/yolov5 3.0建議搭配pytorcp.6
安裝方式一:在網站中找到對應的版本然后離線安裝
https://download.pytorch.org/whl/torch_stable.html
方式二:
conda install pytorch=1.7.1 torchvision=0.8.2 cudatoolkit=10.2 -c https://mirrors.tuna.tsinghua.edu.cn/anaconda/cloud/pytorch/
6.驗證
import torch

#查看版本

print(torch.__version__)

#查看gpu是否可用

torch.cuda.is_available()

#返回設備gpu個數

torch.cuda.device_count()

7.圖像檢測

8.攝像頭
python detect.py --source 0
9.mp4視頻測試
python detect.py --source 161.mp4 (這里接視頻的位置)

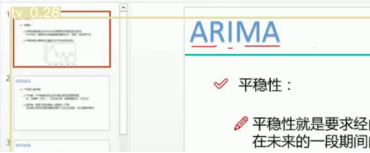
如上圖���,視頻已經被識別過啦
過程中的一些報錯
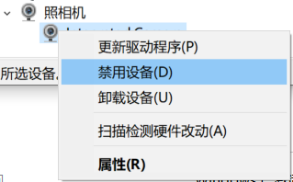
報錯1:打開攝像頭報錯

File "D:\BIG-YOLOV5\YOLO\yolov5-4.0\yolov5-4.0\utils\datasets.py", line 276, in __init__
assert cap.isOpened(), 'Failed to open %s' % s AssertionError: Failed to open 0
解決辦法:找到設備管理器-照相機-右鍵開啟設備
報錯2:攝像頭報錯

解決辦法:本人用的是聯想拯救者電腦
1電腦-右鍵屬性-設備管理器-照相機-點擊開啟
2開始-設置-隱私-相機-將設置都打開
3點擊任務欄上的電池圖標,將攝像頭隱私開啟。
報錯3:在創建虛擬環境后,安裝庫的時候出現錯誤
WARNING conda.gateways.disk.delete:unlink_or_rename_to_trash(139): Could not remove or rename D:\anaconda\pkgs\notebook-6.2.0-py38haa244fe_0.tar.bz2. Please remove this file manually (you may need to reboot to free file handles)
原因:在安裝庫的中途退出了
解決辦法:conda clean --all
報錯4:
An unexpected error has occurred. Conda has prepared the above report.
If submitted, this report will be used by core maintainers to improve
future releases of conda.
解決辦法:conda clean -i
報錯5:cv2版本報錯4.5.1
cv2.error: OpenCV(4.5.1)C:\Users\appveyor\AppData\Local\Temp\1\pip-req-build-1drr4hl0\opencv\modules\highgui\src\window.cpp:717: error: (-2:Unspecified error) The function is not implemented. Rebuild the library with Windows, GTK+ 2.x or Cocoa support. If you are on Ubuntu or Debian, install libgtk2.0-dev and pkg-config, then re-run cmake or configure script in function 'cvWaitKey'
解決辦法:這個錯誤可真是解決太長時間�,一直找不到原因���,一直試一直試.....
Cv2的版本不能是4.5����,需要指定成4.4或者以下�。Python3.8裝不上cv2 4.4。所以需要安裝python3.7版本����,這樣才能將cv2的4.4版本安裝上去����。同時在安裝庫的時候需要先安裝opnecv-python���,不能先安裝numpy�,這樣才能安裝上cv2的4.4版本。
到此這篇關于win10+anaconda安裝yolov5的方法及問題解決方案的文章就介紹到這了,更多相關win10+anaconda安裝yolov5內容請搜索腳本之家以前的文章或繼續瀏覽下面的相關文章希望大家以后多多支持腳本之家!
您可能感興趣的文章:- yolov5 win10 CPU與GPU環境搭建過程
- 基于Pytorch版yolov5的滑塊驗證碼破解思路詳解