創建陰影效果需要操作以下4個屬性:
1.context.shadowColor:陰影顏色。
2.context.shadowOffsetX:陰影x軸位移。正值向右,負值向左。
3.context.shadowOffsetY:陰影y軸位移。正值向下,負值向上。
4.context.shadowBlur:陰影模糊濾鏡。數據越大,擴散程度越大。
這四個屬性只要設置了第一個和剩下三個中的任意一個就有陰影效果。不過通常情況下,四個屬性都要設置。
例如,創建一個向右下方位移各5px的紅色陰影,模糊2px,可以這樣寫。
JavaScript Code復制內容到剪貼板
- context.shadowColor = "red";
- context.shadowOffsetX = 5;
- context.shadowOffsetY = 5;
- context.shadowBlur= 2;
需要注意的是,這里的陰影同其他屬性設置一樣,都是基于狀態的設置。因此,如果只想為某一個對象應用陰影而不是全局陰影,需要在下次繪制前重置陰影的這四個屬性。
運行結果:
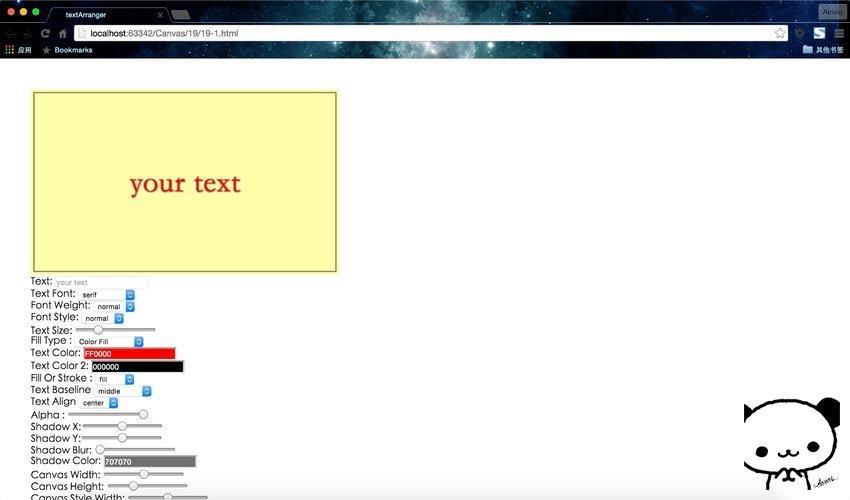
陰影文字:
只要設置shadowOffsetX與shadowOffsetY的值,當值都正數時,陰影相對文字的右下
方偏移。當值都為負數時,陰影相對文字的左上方偏移。
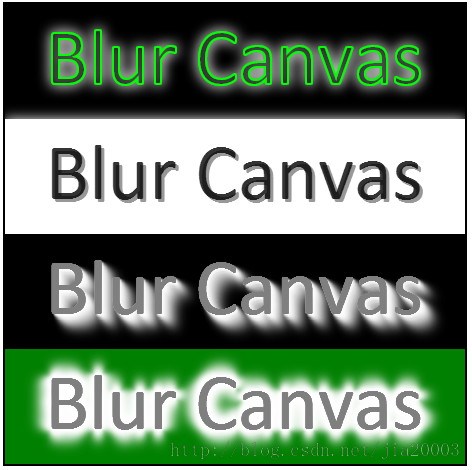
3D拉影效果:
在同一位置不斷的重復繪制文字同時改變shadowOffsetX、shadowOffsetY、shadowBlur
的值,從小到大不斷偏移不斷增加,透明度也不斷增加。就得到了拉影效果文字。
邊緣模糊效果文字:
在3D拉影效果的基礎上在四個方向重復,就得到了邊緣羽化的文字效果。
運行效果:
程序代碼:
JavaScript Code復制內容到剪貼板
- <!DOCTYPE html>
- <html>
- <head>
- <meta http-equiv="X-UA-Compatible" content="chrome=IE8">
- <meta http-equiv="Content-type" content="text/html;charset=UTF-8">
- <title>Canvas Clip Demo</title>
- <link href="default.css" rel="stylesheet" />
- <script>
- var ctx = null;
- var imageTexture = null;
- window.onload = function() {
- var canvas = document.getElementById("text_canvas");
- console.log(canvas.parentNode.clientWidth);
- canvas.width = canvas.parentNode.clientWidth;
- canvas.height = canvas.parentNode.clientHeight;
-
- if (!canvas.getContext) {
- console.log("Canvas not supported. Please install a HTML5 compatible browser.");
- return;
- }
- var context = canvas.getContext('2d');
-
-
- context.fillStyle="black";
- context.fillRect(0, 0, canvas.width, canvas.height/4);
- context.font = '60pt Calibri';
-
- context.shadowColor = "white";
- context.shadowOffsetX = 0;
- context.shadowOffsetY = 0;
- context.shadowBlur = 20;
- context.fillText("Blur Canvas", 40, 80);
- context.strokeStyle = "RGBA(0, 255, 0, 1)";
- context.lineWidth = 2;
- context.strokeText("Blur Canvas", 40, 80);
-
-
- var hh = canvas.height/4;
- context.fillStyle="white";
- context.fillRect(0, hh, canvas.width, canvas.height/4);
- context.font = '60pt Calibri';
-
- context.shadowColor = "RGBA(127,127,127,1)";
- context.shadowOffsetX = 3;
- context.shadowOffsetY = 3;
- context.shadowBlur = 0;
- context.fillStyle = "RGBA(0, 0, 0, 0.8)";
- context.fillText("Blur Canvas", 40, 80+hh);
-
-
- var hh = canvas.height/4 + hh;
- context.fillStyle="black";
- context.fillRect(0, hh, canvas.width, canvas.height/4);
- for(var i = 0; i < 10; i++)
- {
- context.shadowColor = "RGBA(255, 255, 255," + ((10-i)/10) + ")";
- context.shadowOffsetX = i*2;
- context.shadowOffsetY = i*2;
- context.shadowBlur = i*2;
- context.fillStyle = "RGBA(127, 127, 127, 1)";
- context.fillText("Blur Canvas", 40, 80+hh);
- }
-
-
- var hh = canvas.height/4 + hh;
- context.fillStyle="green";
- context.fillRect(0, hh, canvas.width, canvas.height/4);
- for(var i = 0; i < 10; i++)
- {
- context.shadowColor = "RGBA(255, 255, 255," + ((10-i)/10) + ")";
- context.shadowOffsetX = 0;
- context.shadowOffsetY = -i*2;
- context.shadowBlur = i*2;
- context.fillStyle = "RGBA(127, 127, 127, 1)";
- context.fillText("Blur Canvas", 40, 80+hh);
- }
- for(var i = 0; i < 10; i++)
- {
- context.shadowColor = "RGBA(255, 255, 255," + ((10-i)/10) + ")";
- context.shadowOffsetX = 0;
- context.shadowOffsetY = i*2;
- context.shadowBlur = i*2;
- context.fillStyle = "RGBA(127, 127, 127, 1)";
- context.fillText("Blur Canvas", 40, 80+hh);
- }
- for(var i = 0; i < 10; i++)
- {
- context.shadowColor = "RGBA(255, 255, 255," + ((10-i)/10) + ")";
- context.shadowOffsetX = i*2;
- context.shadowOffsetY = 0;
- context.shadowBlur = i*2;
- context.fillStyle = "RGBA(127, 127, 127, 1)";
- context.fillText("Blur Canvas", 40, 80+hh);
- }
- for(var i = 0; i < 10; i++)
- {
- context.shadowColor = "RGBA(255, 255, 255," + ((10-i)/10) + ")";
- context.shadowOffsetX = -i*2;
- context.shadowOffsetY = 0;
- context.shadowBlur = i*2;
- context.fillStyle = "RGBA(127, 127, 127, 1)";
- context.fillText("Blur Canvas", 40, 80+hh);
- }
- }
-
- </script>
- </head>
- <body>
- <h1>HTML5 Canvas Clip Demo - By Gloomy Fish</h1>
- <pre>Fill And Stroke Clip</pre>
- <div id="my_painter">
- <canvas id="text_canvas"></canvas>
- </div>
- </body>
- </html>